
Message Window
BUSMASTER reports all kinds of messages through this window. A message can arise from any one of the two categories as mentioned below Message transmitted across the CAN bus, including the one generated by BUSMASTER. Error messages
Each message is displayed in a separate line, which consists of the following five fields listed below respectively Time – Time can be viewed in three different modes, namely System – In this mode, message will be displayed with PC/System time. Relative – In this mode, message will be displayed with time since the reception of the message with same identifier previously. Absolute – In this mode, the reference is the time of connection. Messages will be displayed with time since the logical connection with the device(ES581) is established.
In all cases time format is maintained as HH: MM: SS: MS where MS stands for millisecond, and the display will be in 24-hour scale.
- Tx/Rx - A message transmitted from BUSMASTER is tagged as Tx whereas for a received one the tag is Rx.
- Type – The indicates if the message is of standard, extended or RTR type, the convention followed is S – Standard frame X – Extended frame Sr – Standard RTR frame Xr – Extended RTR frame
- Message - This section contains the message ID. However, BUSMASTER enables to attribute a message with a specified name and color. If a particular message code is attributed with a name and a color, message name will appear in place of message ID and the message will be displayed in the specified color.
- DLC – It is abbreviation for data length count. It shows number of data bytes in the message body.
- Data Byte(s) – The data bytes are displayed either in hexadecimal or in decimal mode. Please refer to section Toggle numeric mode to know how to toggle numeric modes. On occurrence of an error a suitable error message will be displayed in red color
For CAN FD messages, the message window can display larger payloads up to 64 data bytes and CAN FD related frame attributes. When a DBC database is loaded, message and signal interpretation can be applied to CAN FD frames in the same workflow used for classic CAN messages.
BUSMASTER also supports importing recorded traffic into the message window for analysis. Supported log formats include BUSMASTER LOG, ASC, BBD, and BLF. This is useful when a customer provides an offline log file and the traffic needs to be reviewed without reconnecting to the vehicle or device.
The following subsections describe various toolbar buttons used to change display of message entry.
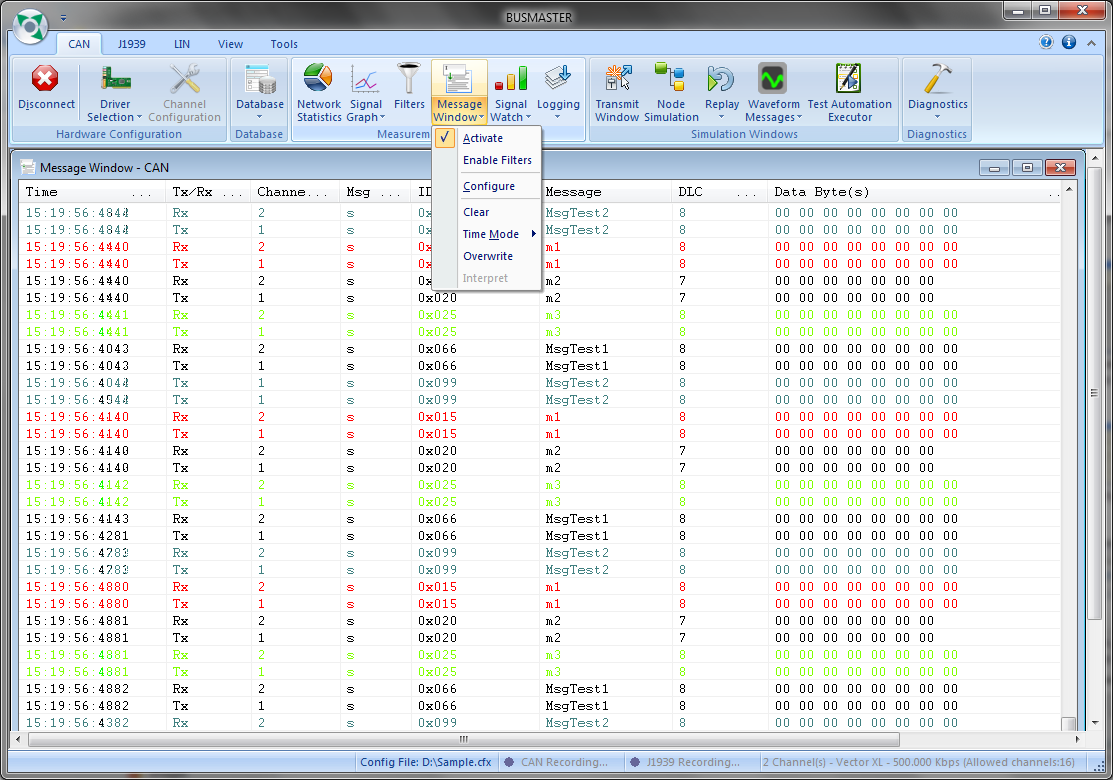
Change Time Display
Section titled “Change Time Display”This is a tool bar button which pops out a menu with three options System, absolute and relative time mode display.### Toggle Message Overwrite
This is a toggle tool bar button. This button is used to switch between message overwrite mode and append mode. In message overwrite mode there will be only one instance of a message ID in the message window. Subsequent messages received with the same ID will overwrite the message entry. In append mode a newly added message entry will be appended instead. Please refer to description B of the figure shown in section Message Window.### Toggle Numeric Mode
This is a toggle tool bar button. This button is used to switch between decimal mode and hexadecimal mode. In decimal mode data bytes will be displayed in decimal format. In hexadecimal mode data bytes will be displayed in hexadecimal format. By default massages will be displayed in hexadecimal mode. Please refer to description C of the figure shown in section Message Window.### Toggle Message Interpretation
This is a toggle tool bar button. This button is used either to enable or disable message on-line interpretation. This button is enabled only in message overwrite mode. If on-line interpretation of message is enabled, a message entry will be followed by a textual description of the received message. Please refer to description D of the figure shown in section Message Window
The aforementioned will be done only if the message ID is found in the database. Else the message will be followed by a notification message stating “message not found in the database”.
Message interpretation can be obtained by double clicking on the message.### Selective Message Interpretation
Messages can be selectively interpreted in overwrite display mode. Select a database message entry and right click. BUSMASTER will popup this menu.
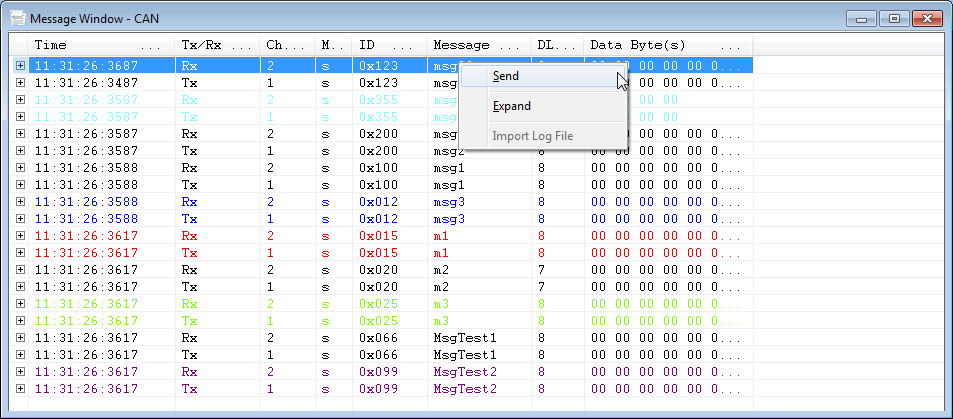
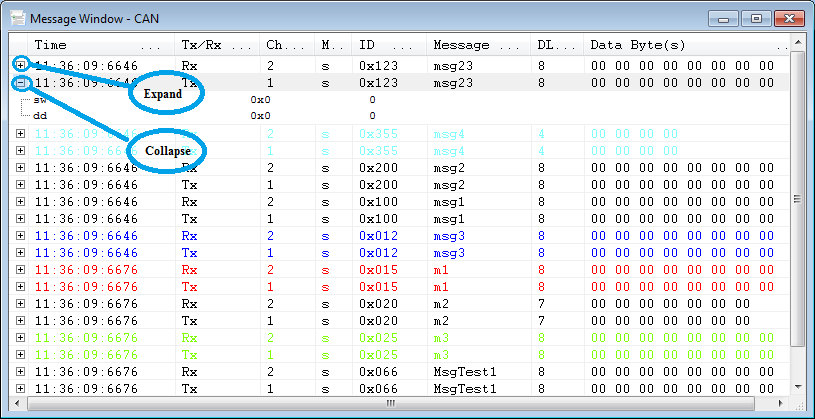
Select Expand to expand the message entry with its signal value. Signal values will be displayed in terms Raw and Physical values. The expanded entries can be closed by right clicking on that entry and selecting Collapse. The expanded entries can be closed by right clicking on that entry and selecting Collapse. Alternatively we can click on the ‘+’ sign shown against each interpretable message to expand the message entry And clicking on the ‘-’ sign will collapse the expanded entries as shown in figure below.
 ### Interpretation Dialog
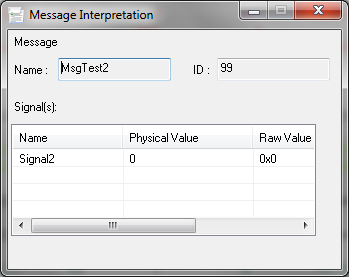
A message can be interpreted separately in a popup window using Interpretation dialog. Double clicking a message entry will show interpretation dialog with the message details. This will have a list of signals and its Raw and Physical Values.
Left clicking on the message entry will change the message selection.### Sending a Message From Message Display
Messages can be directly send from Message Display entry. Select a message entry and right click. This will popup message operation menu (Refer Fig.1). Select Send to transmit the selected message entry on the CAN bus.### Clear Message Window
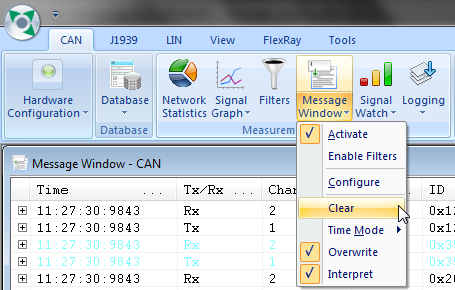
On pressing the tool bar button shown below the message window will be cleared.
 ### Large Log Review
When reviewing large files, use overwrite mode, message filters, and database interpretation selectively. These options reduce visual noise and make it easier to focus on the message identifiers or channels involved in the issue.
If the log file was captured in ASC or BLF format, import it into the message window first, then apply the same interpretation and filtering tools used for live bus traffic.### Message Columns Ordering and visibility
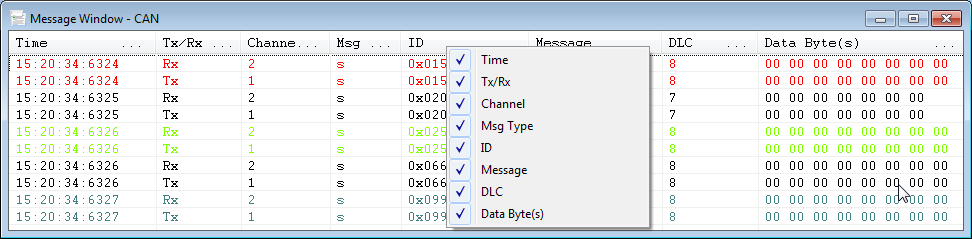
Message columns can be dragged and dropped to any column position in the message window according to user’s preference. The columns can also be shown or hidden. To show/ hide a column, right click on the columns header, a popup menu with all the column header names will be shown as shown in fig. 6 below. The columns which are currently shown are marked with a check mark against them in this menu. If user wishes to hide a column, just uncheck that column from the menu and the column will be hidden.
These column ordering and visibility are saved along with configuration.
Authoritative source: BUSMASTER DITA help source message_window.dita, compiled into BUSMASTER.CHM with the application.