
Node Simulation Configuration
Simulated systems can be configured under the
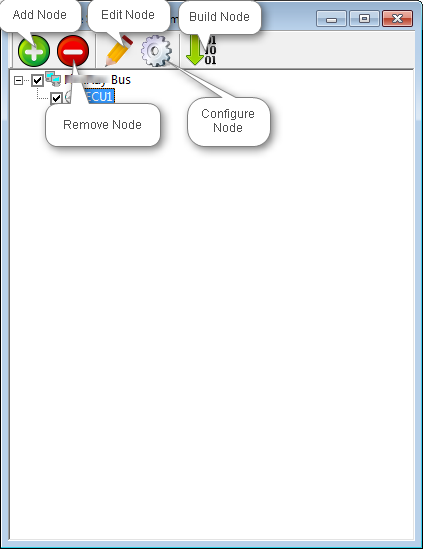
Add Node
Section titled “Add Node”This is used to added .cpp/.dll files to Node Simulation. Add Node can be done by following ways: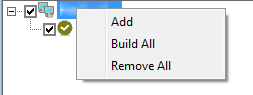
Right click the Root Node(
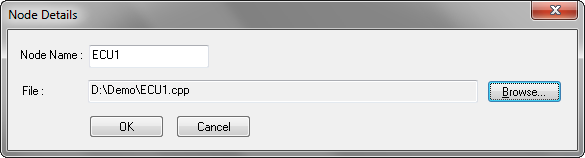
Then “Node Details” dialog box appears as shown below. Add unique Node name and add existing .cpp/.dll or provide new File name to create new .cpp file.
 ### Edit Node
This is used to edit the .cpp file attached to a Node. Editing can be done by following ways:
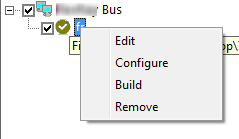
Select the Node then Right click and select “Edit”. Select the Node and click “Edit Node” in the toolbar. Select the Node and press “Enter” key in the keyboard.
Then “Function Editor” window appears in which the required editing can be done.### Remove Node
This is used remove selected node all the nodes in the Simulated system. Removing a Node can be done by following ways:
- Select the Node then Right click and select “Remove”. To Remove All Nodes select Root Node(
Bus) and select “Remove All”. - Select the Node and click “Remove Node” in the toolbar. To Remove All Nodes select Root Node(
Bus) and select “Remove Node” in the toolbar. - Select the Node and press “Delete” key in the keyboard. To Remove All Nodes select Root Node(
Bus) and press “Delete” key.### Configure Node
This is used change the name of the Node or change/add .cpp/.dll associated with a Node. Configuring a Node can be done by following ways:
- Select the Node then Right click and select “Configure”.
- Select the Node and click “Configure Node” in the toolbar.
- If no .cpp/.dll files are associated with the node previously, then by pressing “Enter” key in the keyboard.### Build Node
This is used build the .cpp files associated with selected Node or all the nodes in the Simulated System. Building a Node can be done by following ways:
- Select the Node then Right click and select “Build”. To Build All Nodes select Root Node(
Bus) and select “Build All”. - Select the Node and click “Build Node” in the toolbar. To Build All Nodes select Root Node(
Bus) and select “Build All” in the toolbar.### Enable/Disable Node
This used to active/deactivate selected Node or all the Nodes in the Simulated System. Enabling/Disabling can be done by following ways:
- Check/Uncheck the checkbox associated with the Node will Enable/Disable the Node respectively. To Enable/Disable all the Nodes Check/Uncheck the Root Node(
Bus) respectively. - “Spacebar” key can be used as keyboard shortcut to Check/Uncheck the Node(s).1. Node(s) can’t be Added/Removed/Configured/Enabled/Disabled while the network is connected.
- A Node can be edited while the network is connected. But the file must be built again to see the changes.
Authoritative source: BUSMASTER DITA help source Node_Simulation_Configuration.dita, compiled into BUSMASTER.CHM with the application.