
Slave
Creating Slave**:**
To create or edit slave nodes right click on the ‘Slaves’ element in the Element View. By default one slave will be created on creating new LDF file. ‘Create Slave Dialog’ is as shown below.
Slave can be created with the following Slave Protocol versions, Properties displayed will vary based on the protocol version selected
Slave created with the protocol version 1.3 is as shown below 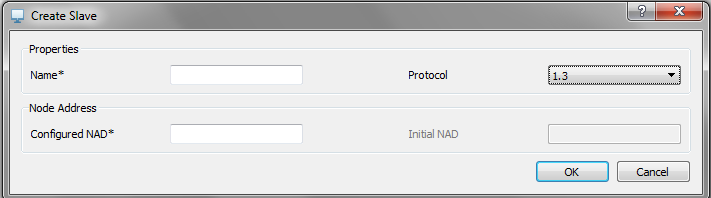 Slave created with the protocol version 2.0 is as shown below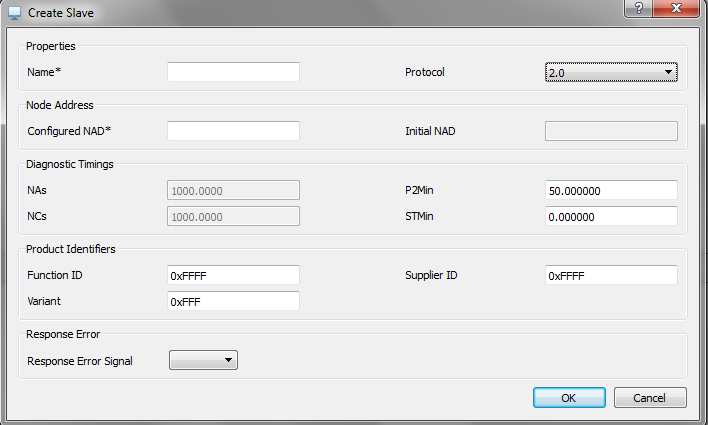
Slave created with the protocol version 2.1 is as shown below 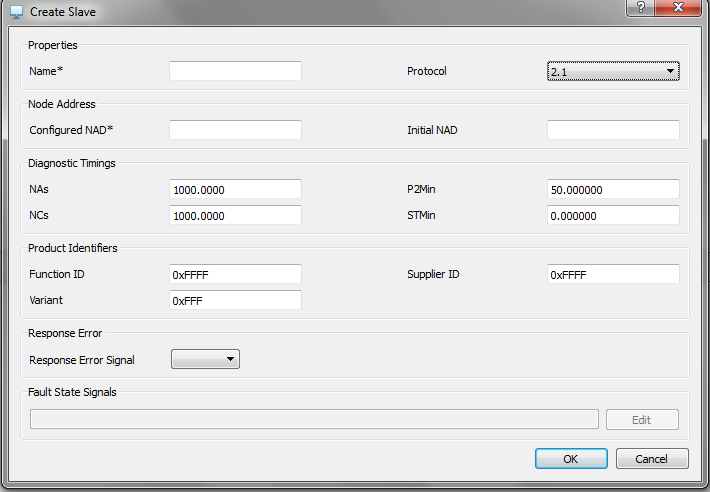
General Properties: Name: Name of the Slave which should follow C identifier rules and should be unique. Protocol Version: For LDF Version 2.1, Protocol version drop down will be populated with 1.3,2.0 and 2.1 For LDF Version 2.0, Protocol version drop down will be populated with 1.3 and 2.0 For LDF Version 1.3, Protocol version drop down will be populated with 1.3 Response Error Signal: Response Error Signal drop down will be populated with the list of signals existing in the configuration. Response Error Signal is displayed if the Slave protocol versions 2.0 and 2.1 Fault State Signals: To specify fault state signals, click on ‘Edit’ button which displays 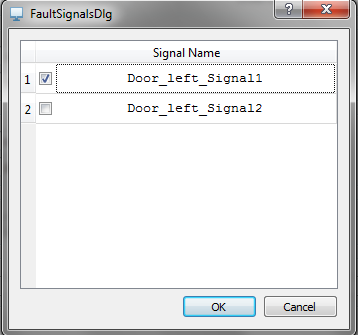
Editing Slave:
To Edit the existing Slave node, right click on the Slave in the Element View and select popup menu ‘Edit’ which displays
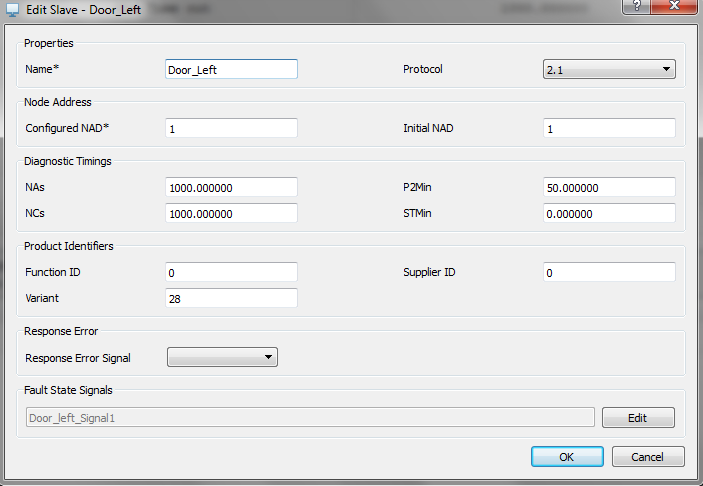
Deleting Slave:
To delete Slave node, right click on the Slave node in the Element View and select pop up menu ‘Delete’. Confirmation message will be displayed before deleting the Node.
On deleting node, all the frames and signals published by the node will also be deleted.
To save the changes click on ‘OK’ button. Errors are displayed if validation fails.
The following validations are performed: Slave name will be checked for its uniqueness On delete, checks if at least one Slave node is available. If not tool will give error.
Authoritative source: BUSMASTER DITA help source LIN_Editor_SlaveDialog.dita, compiled into BUSMASTER.CHM with the application.